Hey everyone and welcome to another post!
I know I don't usually post step-by-step tutorials on Wednesday's but I feel like I haven't done any more masculine cards in so long so I wanted to share one with you today and another one on Sunday.
I still sometimes find it quite difficult to create masculine cards as most of my supplies are more typically feminine.
I'm so happy with how this card turned out and it's so quick to do. If you want to find out how you can re-create this then just keep reading.
Steps:
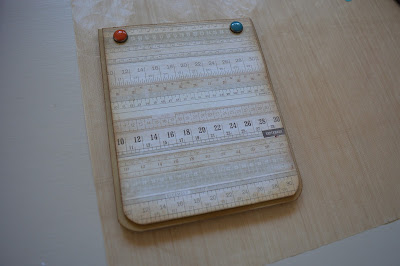
1) For your card base you will need some card stock cut to 4 1/2" x 11" scored at 5 1/2". This will create a top folding card. I chose a deep cream card
2) Round the bottom two corners of your card base
3) Lightly sponge around the edges of your card. I used a distress ink. I love using this technique to add dimension. Just make sure you sponge off excess ink on some scrap paper to avoid a too heavy application
4) Cut of piece of DSP 4 1/4" x 5 1/4" and sponge around the edges with the same colour. Be sure to round the bottom two corners again. I adhered my DSP with dimensionals because I wanted to add some brads as decor
5) Attach two brads to the top of your dsp before you attach it to your card base
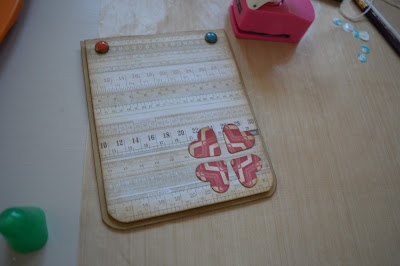
6) Punch out four hearts with a different DSP. I used a medium sized heart punch. Then adhere to the bottom right hand corner of your card with the point of the heart facing the centre. This will create a flower-like pattern
7) Stamp your sentiment onto some card the same colour as your card base. I cut out my 'great grandad' to a rectangle and used a hexagon punch to banner one side. I then stamped my sentiment and cut it out using a label punch from Stampin' Up! I also used the same punch to cut out a piece of DSP (same as heart). I also sponged around the edges of my sentiments
8) Cut your DSP label in half and stick to behind your sentiment slightly spread about to it creates a border at the top and bottom
9) Adhere your sentiments to your card
10) I cut out a piece of card 4" x 5" for the inside, rounded both bottom corners and punch out four smaller hearts to mimic the flower-like pattern at the front
There you have it! I really hope you enjoyed this post and you could definitely re-create this card for anyone and any occasion.
Even though I feel like I struggle more creating cards for males I always love how they turn out. I like them being very minimal and vintage.
If you re-create anything on the blog be sure to tag me so I can re-post!
Let us know what else you'd like to see on the blog.
Happy crafting!
Susan x


No comments:
Post a Comment