Hi everybody!
I'm so sorry for this post being a day late but I didn't have the camera with me unfortunately!
I wanted to do a quick and simple post for you today showing how you can make a Midori Pocket Insert for your Fauxdori's, Foxydori's or even one you have made yourself.
If you read my post you will know I love the whole travellers notebook world and making my own inserts and accessories is something I really enjoy doing.
I showed a picture of one I made in my DIY paperdori post, you can find it here. I wanted to show you exactly how I made it in tonights post.
If you want to find out how to make one of your own then click the button below.
I would first like to apologise for some of these pictures. I have a white desk and I was using white card as it was the only thing big enough! If you have any questions about the steps then just ask down below. You will need to start off with an A3 piece of card. You will then need to score across the card with the 16 1/2" at the top and bottom. Score at 3 1/4", 8 1/4" an 13 1/4".
Fold the scoreline in the centre so you fold the card in half. You then need to cut the height of your card to 8 3/4". The reason I did this after scoring was my paper trimmer isn't big enough for a 16 1/2" card. You can then fold the other two score lines.
You will then need to score 1/2" from the bottom all the way across the card. Fold and burnish this score line.
Then take a pair of scissors and remove both of the rectangles on the bottom left and right corner. You will need to cut slightly above the score lines as it will make your pockets a lot smoother. You will also need to cut into the middle score line up the 1/2" score line. You will then be left with two rectangle tabs. Notch in slightly on both sides.
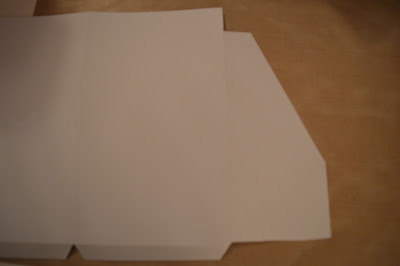
Turn you card over so the inside of the pocket is facing down. To create the shape of the pockets you will need a ruler and a pencil. Measure down 1" from the top of your first scoreline on the left, then measure across 1" from that point and draw a line. You then need to measure up 2 1/2" from the very bottom right of the same section. Connect this point to the end of the line you drew. Then simply cut away where you have marked. You should end up with something that looks like the above.
Fold in half and use your first one as a guide to cut the second.
Fold both the sides in towards the centre and stick the two tabs up to secure it all in place.
The final step is to round all corners. Fold your pocket to do the centre ones. This will also help keep your pocket in place when it's inside your midori and also help to avoid tearing.
Then all you need to do is fill your pockets with lots of goodies.
As you can see they are just quick and easy to make. You will just need to adjust your sizes slightly depending on how you big you need it to be. If you have trouble doing this or find it confusing, as it can be, comment down below and I'd be happy to help!
The other thing I love about making my own is that I can embelish it however I would like to. You can add some scrapbook paper, stickers or anything you want to make it look exactly how you like.
Would you like to some more DIY travellers notebook related things? Do you love making your own?
Thanks so much for reading this post!
Hugs
Danielle <3


No comments:
Post a Comment