
Hey everyone and welcome back to another post! I am so excited to be back to blogging this year as me and Danielle have come up with so many fun ideas to say thanks to everyone to check in and reads our post! Stay tuned to find out what.
Today's post is a short tutorial to show you how you can easily create a cute and extremely functional bookmark. I did a diy bookmark tutorial a while ago but I actually think I prefer this style!

This bookmark has a magnetic closure which allows you to mark a page - or even multiple pages - and not worry about it slipping down or falling out. I usually have my book on my bedside table and I always tend to pick it up in a way that the pages all open and of course the bookmark comes out! I never remember what page I am and have to search through the book to see. This one is perfect as it's strong enough to keep in place even if your book opens.
Another great thing about this bookmark is that it's a cute way of using up some of your scraps!
If you want to find out how you can make your own then just keep reading!
Steps:
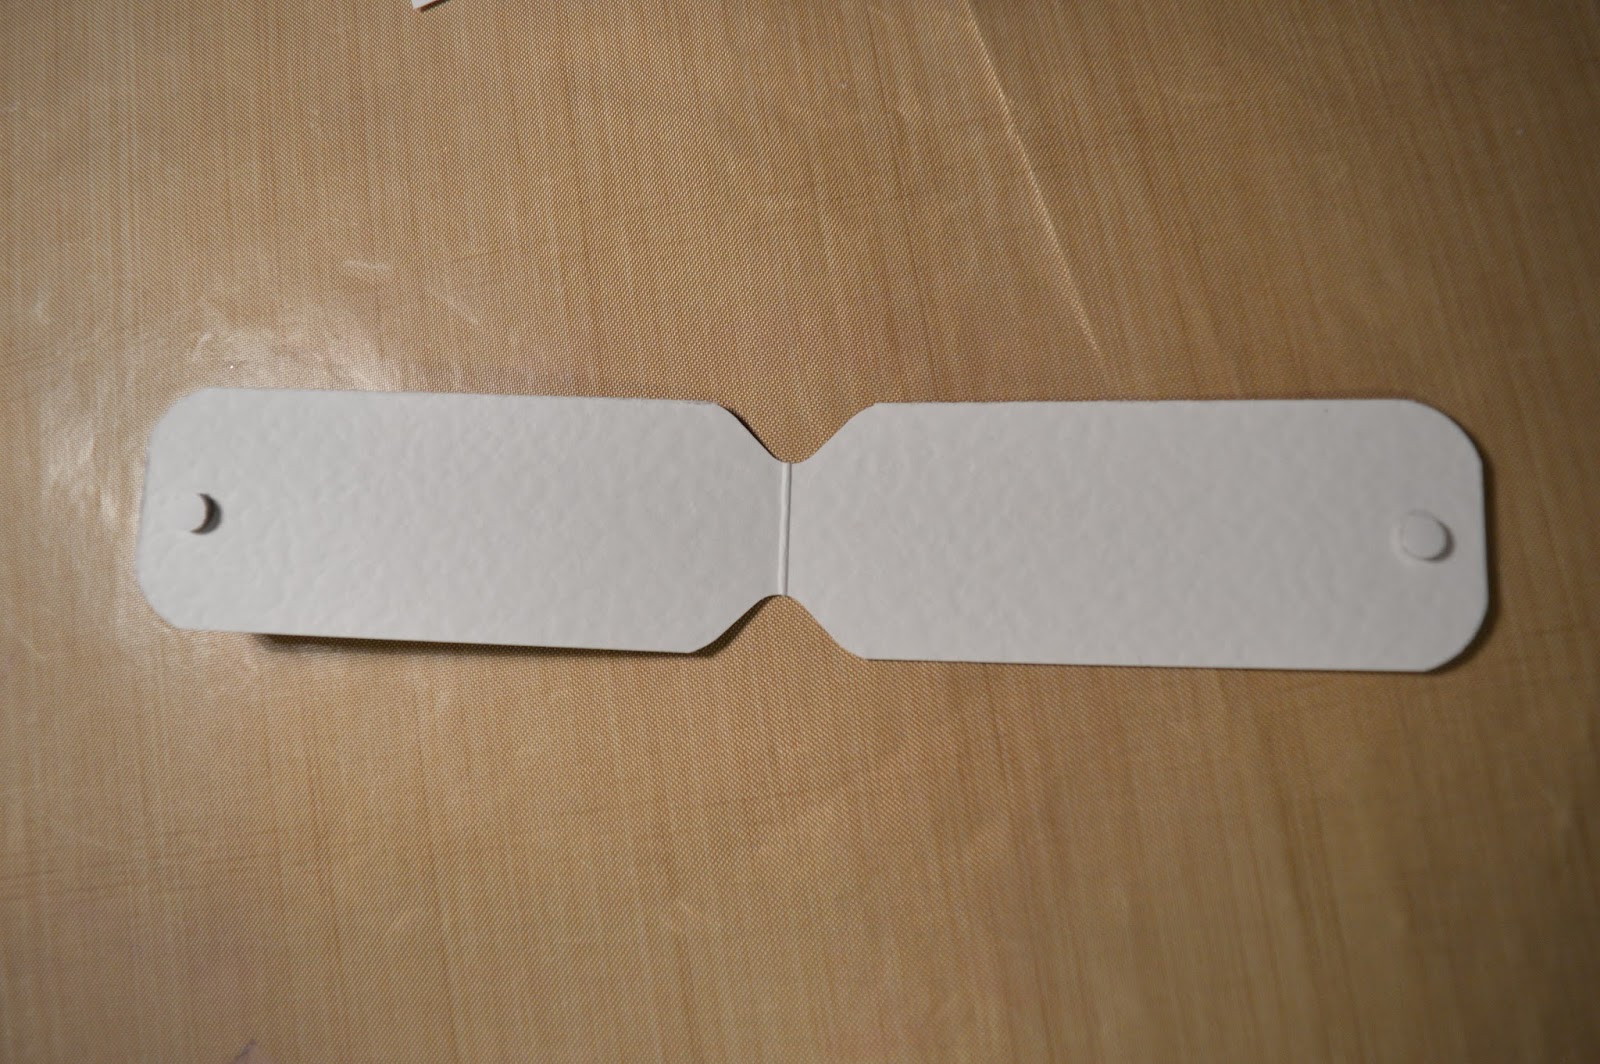
1) First you simply need to cute a piece of card to 8" x 1 1/2" and score at 4" on the long side

2) I used an envelope punch board for this step but you could skip it completely to use scissors to cute out a triangle. Place the scoreline in the centre of the front of the punch and press. Repeat on the opposite side


3) Stamp a pattern onto your card. To skip this step you could use patterned card but it needs to be fairly thick

4) Round all four corners

5) Using a small glue dot (or any adhesive of your choice) stick a small magnet to the inside of your bookmark on one side. I purchased mine from amazon. Then punch out a circle the same size as your magnet. Slightly smaller will be fine

6) Stick your circle over your magnet. This will just prevent your magnets being too strong and ripping your paper

7) Place your second magnet over the one already stuck down and put some adhesive on the back. Then fold your magnet in half to ensure you have it in the right place on the other side

8) Punch out another circle and stick to the other magnet
9) Fold your magnet in half and punch a small hole in the top. I used a 1/8" punch

10) Tie a ribbon through the hole and you are complete!

Looks pretty sticking out the book!

As you can see it's incredibly easy to do and as I said early it has a very functional use!
If you remake this, take a picture with it in your favourite book and tag me on instagram or twitter! I would look to see them and I will retweet/repost your pics!
I hope you enjoyed this post, pop a comment down below and let us know what else you would like to see!
Happy crafting!
Susan x
No comments:
Post a Comment