
Hi everyone!
If you've been reading my posts since I started doing posts on her you may know I have been very interested in the Midori world. I have seen to many videos on youtube and pictures on Instagram of people using midoris and travellers notebook in such creative ways.
I have a couple of Foxydori's - shop here - on my christmas wish list but I really wanted to try and make my own. I had a browse online of anywhere I could get my hands on some faux leather or PVC material but being an impatient person I decided to give a go with paper.

If you aren't familiar with Midori's check out this awesome video by the Reset Girl here. She goes in-depth about sizes, where you can purchase them from and the accessories you get for them.
It was actually a lot easier than I thought to make and I also liked the fact I could add a bit colour to it by using patterned paper.
If you want to find out how to make your own paperdori then just keep reading.

I first chose two pieces of 12" x 12" patterned paper. I wanted a piece with more colour to it for the front and a black and white one for the back. Depended on how big you want to make your depends on how much paper you need. The flower paper is from Amy Tangerine and the black and white is from Studio Calico. I think they look so nice together, I perfect using pieces that contrast each other as opposite to match.

I then cut down my paper to 11" x 8.75". I wanted to use bigger inserts in mine. I wanted room between there the books end - at the side and top/bottom so I just added a bit extra to how big my book are. Also the wider you make your paperdori the more books you can put inside without them sticking out. I also rounded all four corners on both pieces of paper.

Glue both pieces together back to back. Be sure they are both the same way up if it matters with the pattern. I picked up with clear film adhesive from my local asda, it was very inexpensive. I cut two pieces slightly bigger than the paper. I first coated the back and trimmed it to fit. I then coated the front and snipped around so I could fold it over to the back. Not only do you have a nice glossy finish but it also helps to re-inforce the binding between the papers.


You will then need to poke five holes in the centre of your paperdori. Having a t-sqaure ruler for this part is handy. You will need one hole right on the centre, two hole (in line) at the top and two at the bottom. The holes at the top and bottom need to be reasonably close to each other and around 1/4" from the top/bottom of your paperdori.

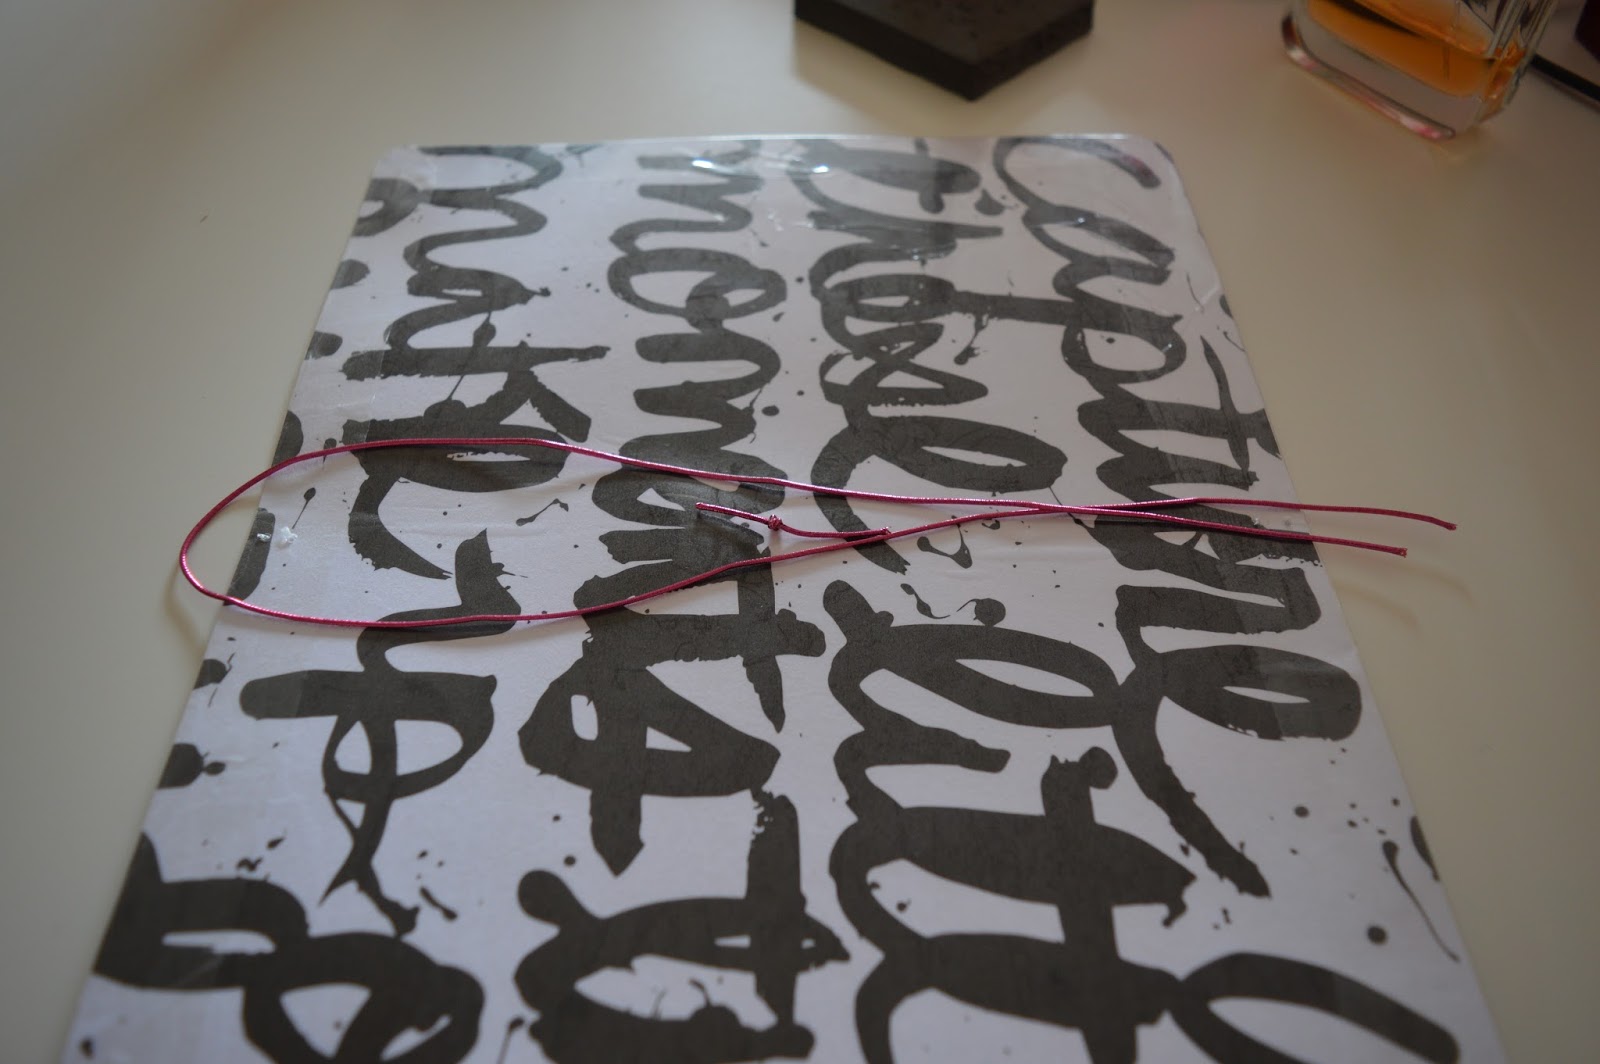
To create the band around the centre of your paperdori, the part that holds it all together, you will need some elastic string. Cut just over the length of your book (width wise).

Simply thread through the centre whole and tie in a single knot. Double check it's not too lose or too tight around your paperdori. Adjust if needed and then tie in a double knot. Depending on how thick your paper was to begin with will make a difference to how easily your paperdori will fold. Once I had completely finished I gently folded it over and place something heavy right on the edge to keep the fold rounded. You don't want a harsh fold.

To create the series of elastics on the inside - what holds your inserts in - you will need just over double the height of your paperdori.

Have your paperdori with the inside facing up and thread the elastic through the top hole you made towards the outside of the book then thread it back up through the whole underneath so it comes back through to the inside.

Then thread the elastic through the next hole - not the middle one - through the outside of the book and finally in the last one back to the inside of the book. Hope that all made sense!

Then simply tie the string you have at either end in the centre of the paperdori on the inside. You should have two long elastics where you will be able to add your inserts.

Here is my finished result.

I made a folder for mine to go around one my inserts.

The inside of the holder and my first insert book.

The back of my first insert book and the other side of the folder. Let me know if you want a tutorial on how you can make your own folder.

My second insert book front and back is below. How cute is the picture of my daughter!


I really hope you enjoyed this tutorial. I was actually thinking about maybe making some of these for a giveaway. What do you think? Would you love to win one of these with some handmade inserts inside it for you?
I think this is such a fun project and if you want to to give the travellers notebook stuff a try then it's a lot cheaper than buying ones you can find online.
I'm obsessed with making the insert books. I keep making them for my family and they look them! Check out the Fridays With Danielle tab at the top of the page to see my post on how to make your own insert book.
I really hope you enjoyed this post and I'm looking forward to posting next week!!
Hugs
Danielle <3
No comments:
Post a Comment