
Hey everyone!
Hope your week has been going very well. Definitely starting to tell summer is over now here in the UK. I love autumnal fashion though so it's all good!
In todays post I wanted to share with you a gift box I made that is perfect for a DVD or small book! I measured a DVD and came up with the dimensions for a box myself. I know I usually post my tutorials on Sundays but I thought I'd share this quick one with you tonight.
I got some free stamps in a magazine I love to buy - Cardmaking & Papercraft and I was totally inspired by the free christmas stamps you get with it. I have used some of the stamps before in a post from this magazine too. I know it's still a while yet before christmas but I never think it's too early to start prepping early!
Follow Cardmaking & Papercraft on twitter here.

And for you crafters out there, it's the perfect size for a Stampin' Up set of stamps that come in the DVD boxes (the slim ones). The perfect present for a fellow crafter!
If you want to find out how to make this then just keep reading.

Steps:
1) Cut two pieces of card stock, different colours if you would like or you could use the same. The base will be 7" x 9 1/4" and the lid will be 1/16" bigger than this on both sides - 7 1/16" x 9 5/16"
2) Stamp a pattern - on your lid. I used a large stamp with some different size and style snowflakes on it. I think it looks so nice all grouped together and stamped multiple times. You could even cut up the stamp and use the snowflakes separately

Also cut out a rectangle piece of card stock - any size you would like just keep it reasonably small - the same colour as your base and stamp on it. This will be used as a tag

3) Score on both pieces of card stock around all four sides at 3/4"

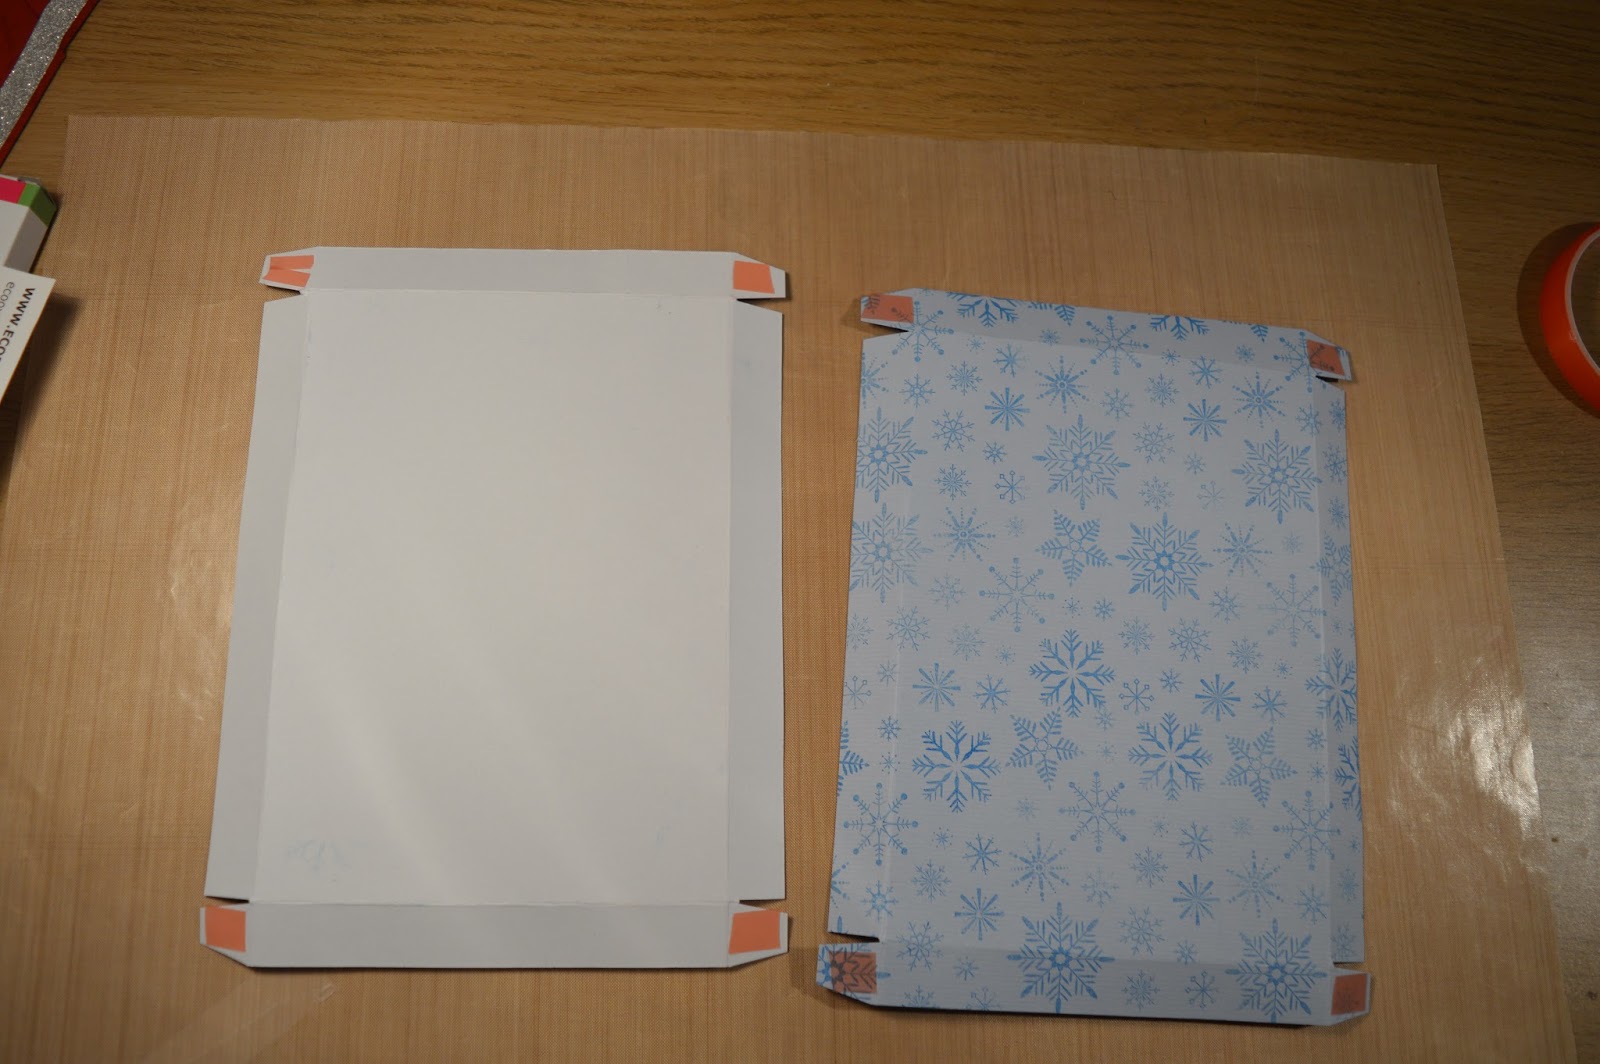
4) Cut into the scorelines on one of the side of each squares on both pieces of card stock on all four squares. So either side on the long rectangle on the longer sides. Don't cut the scoreline between the square and the shorter rectangle on the shorter side. Notch in slightly on both sides. See picture below for reference

5) On the lid piece punch out half a circle on the long tabs on both of the long sides

6) Place some sticky strip on the four squares. On the lid it will be on the pattern side up. Each square will fold into the longer rectangles

7) Test to make sure your lid fits over the base nicely. It shouldn't be too difficult to get it on

As you can see its the perfect size for a DVD

8) Punch out a hole in your tag and add a ribbon around your box to keep the lid on. You can add your tag anyway you would like. I just put it through the ribbon I was using to keep the box shut

Here's another box I made. You can easily make it for a male or female or for any occasion!

I really hope you enjoyed this quick post. If you are in the UK I strongly recommend you head to your local supermarket or anywhere that sells magazines to pick up a copy of the Cardmaking & Papercraft magazine. Not only do they come with amazing stamps but you also get some patterned paper inside you can cut and use, amazing tutorials and tips!
As always if you have any requests or questions feel free to comment down below. Do you have christmas presents in mind for people but you have no idea what you put them in? Check out all my Step by Step tutorial for tons of gift boxes and bag!
Don't forget if you re-make this tag me on twitter or instagram or you can use the hashtag #sukilucrafts.
Happy crafting!
Susan x
No comments:
Post a Comment