
Hey everyone and welcome to another technique tutorial!
I saw a picture of a card in a magazine and was so inspired to re-create it. The way I made it I used a technique to get an ombre flower which would look beautiful on any card. You could also use this technique on a lot of different shapes.

It's so easy to achieve and you can easily control the insensity of it. I will also be showing you how you can create your own 'glitter cardstock' in this tutorial which I have been using a lot recently. I don't have a huge range of colours when it comes to glitter card but after finding a way to create my own I basically have every colour I can possibly think of! If you want to find out how to create this card then just keep reading.
Steps:
1) The first thing you need to do it stamp your design , in my case a flower, with some embossing ink onto some white card and embossing with a white embossing powder.

2) Once you have heat set and it has cooled use some ink and an ink dabber to gentle add some colour to your design. To get the ombre effect start in the middle and pull the colour towards to outside with gentle strokes. Be sure to dab off excess ink onto scrap paper before hand to avoid too much colour. You can also add more if needed.

I did this with a few different colours.
3) Once the ink has dried take a wet wipe (I just use supermarket branded baby wipes) and gently rub the ink off the embossed parts of the stamp. I used Stampin' Ink which easily comes off embossed designs. You may want to test your ink before hand if it's a different brand

4) Fussy cut, or if you have the relevant punch; punch out, your designs

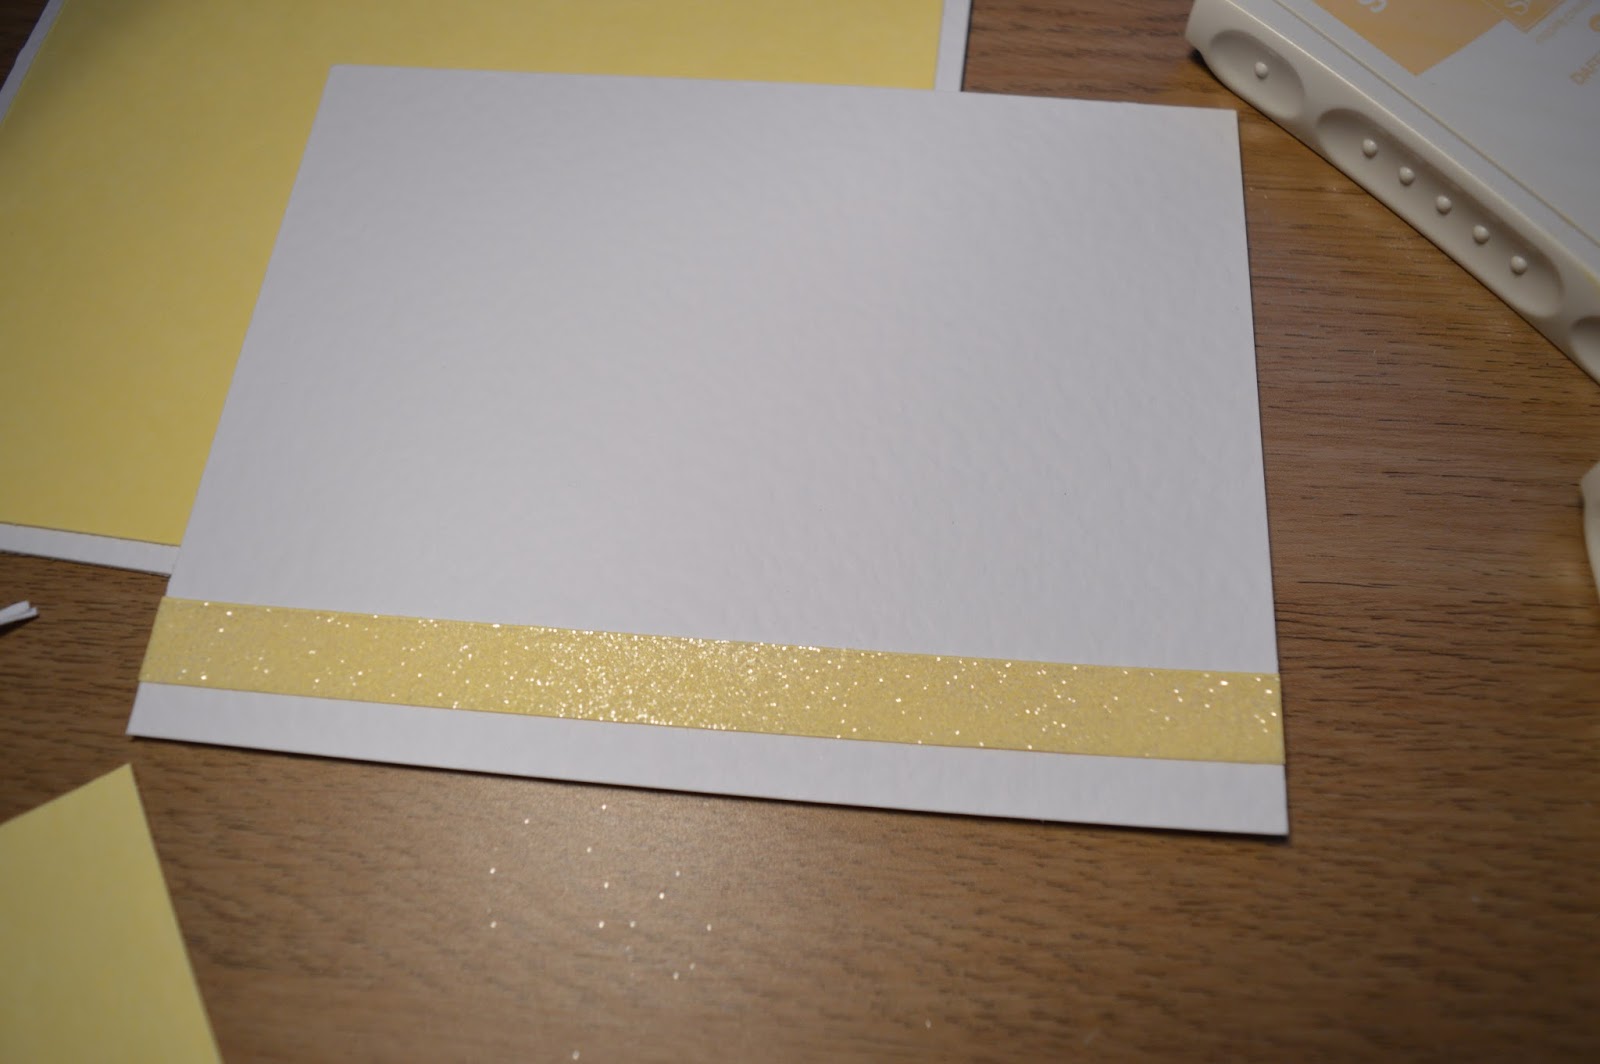
5) To create the glitter card take some double sided thin clear tape and a piece of card - the colour that you would like and tape the double sided tape across one of the sides


6) Peel off the other side and sprinkle some embossing glitter and gently rub in with your finger


7) Tap the card to remove excess and you have create some glitter card. I actually found I didn't get any fall out doing this once I had removed all the excess!

8) Cut the strip and trim to your relevant size, I cut mine so it was 6 1/2" long

9) To make the card you will need a piece of white card stock cut to 11" x 7" score at 5 1/2", a piece of yellow card but 5 1/4" x 6 3/4" and a piece of white card cut to 5" x 6 1/2".

10) Stick your yellow piece onto your card base

11) Attach your 'glitter card' strip to the bottom of your white card and place onto your card base (on the yellow)

12) Finally add your flower and any sentiment you would like and your are done! I found myself not wanted to add any other embellishments onto my card as the pops of colour on the flowers were more than enough!
As you can see this card is very easy to create and you could play around with different stamps to achieve different looks! I can't wait to keep trying this technique in different ways.
Also if you haven't already seen it we are currently hosting a giveaway on our instagram.


Here a little preview of the prizes, a few more to be added! There is still plenty to time to enter. Just check out our instagram page here.
Happy crafting!
Susan x
No comments:
Post a Comment