
Hey everyone and welcome to my second easter post!
I am so excited to share with you todays DIY.

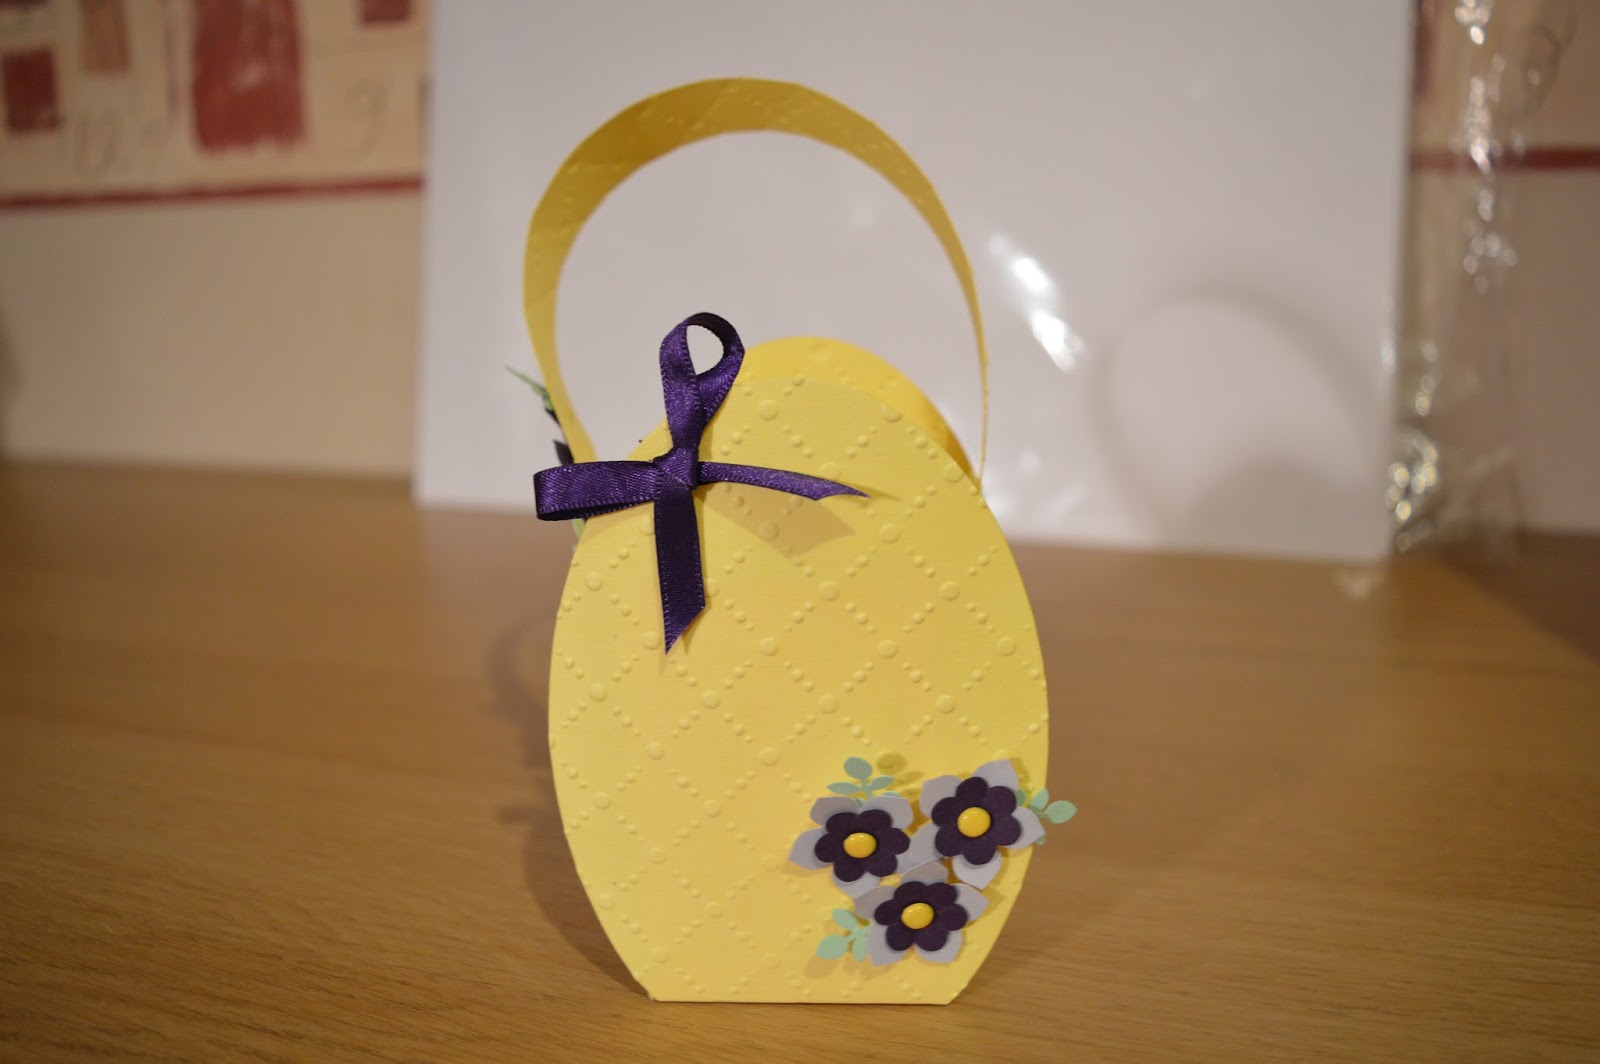
I made these cute little easter egg baskets that are perfect gifts for you children or grandchildren. I think it's adds more of a personal touch and is a bit of a change from giving them store bought easter eggs.
You can fill these with a variety of treats and even little teddies. They also make for a great easter decoration in your room/house.
They are so easy to make and you can decorate them however you like. You could also coordinate the colours with your recipients favourites.
If you want to find out how to make your own then just keep reading.
Steps:
1) The first thing you need to do is cut two oval shapes from some cardstock. I used the largest size from a set I have got

2) To add some texture you can emboss your ovals

3) Cut another piece of cardstock the same colour as your ovals to 8" x 6 1/2". Score on the long side at 3" and 5" and score on the short side at 2" and 4 1/4"

4) Cut into the two scorelines either side of the small squares (between two rectangles) and notch in on both sides

5) Place some double sided adhesive on the back of the squares

6) On the other side place some double sided tape around the edges of the two rectangles


7) Place the sticky side of the square to the inside of the rectangle (where you placed the adhesive)

8) Adhere the other two rectangles onto the outside of your box to create your shape


9) Take your two oval shapes on score 1/2" from the bottom - the smaller part. Repeat on both


10) Use the ridge from the score to adhere to your box. Simply place some liquid adhesive onto the fold and stick to the bottom of your box


11) Put some more adhesive on the side of the box above to secure. Repeat on the opposite side with the other oval shape


12) For the handle cut another piece of cardstock to 11 1/2" x 3/4" and emboss if you would like

13) Attach your handle to the sides of the box you added the oval shapes too. Add whatever decoration you would like. I used two different flowers cut outs and some brads to decorate mine


I also added these tiny leaf cut outs to create more detail


14) Finally add any decoration to the front of your basket. I added a bow and more of the flowers to mine
Then all you have to do is full your basket with goodies!

You could also these in a really fun childrens game! Hide some eggs or presents around your house (or even outdoors) and let them find as many as they can.
I really hope you enjoyed this post. Who else is so excited for easter this year?
Happy crafting! & Easter
Susan x
No comments:
Post a Comment