
Hey everyone and welcome to another post! I'm so excited to share with you today step by step tutorial as I think its such a fun idea.
I have done quite a few gift card holder tutorials since I've started this blog but I think this one is by far my favourite

I looks like a mini purse and open up to reveal the gift to your receiver! It's perfect for giving that personal touch to your gifts and you could even design it to replicate their favourite purse or bag if you have the right paper!
It's so quick and easy to make once you get the steps down. If you want to find out how you can make your own then please keep reading.
Steps:
1) Cut a piece of DSP to 6" x 6" and score at 3" to fold in half


2) Take your paper, still folded and place the corner on the fold on your cutting board along where it cuts the paper and the corner where the each side meets on the cutting board at 5/8". I have enlarged the picture below so you can hopefully see how you do this

This should trim the sides so it cuts out a triangle

3) Repeat on both sides.

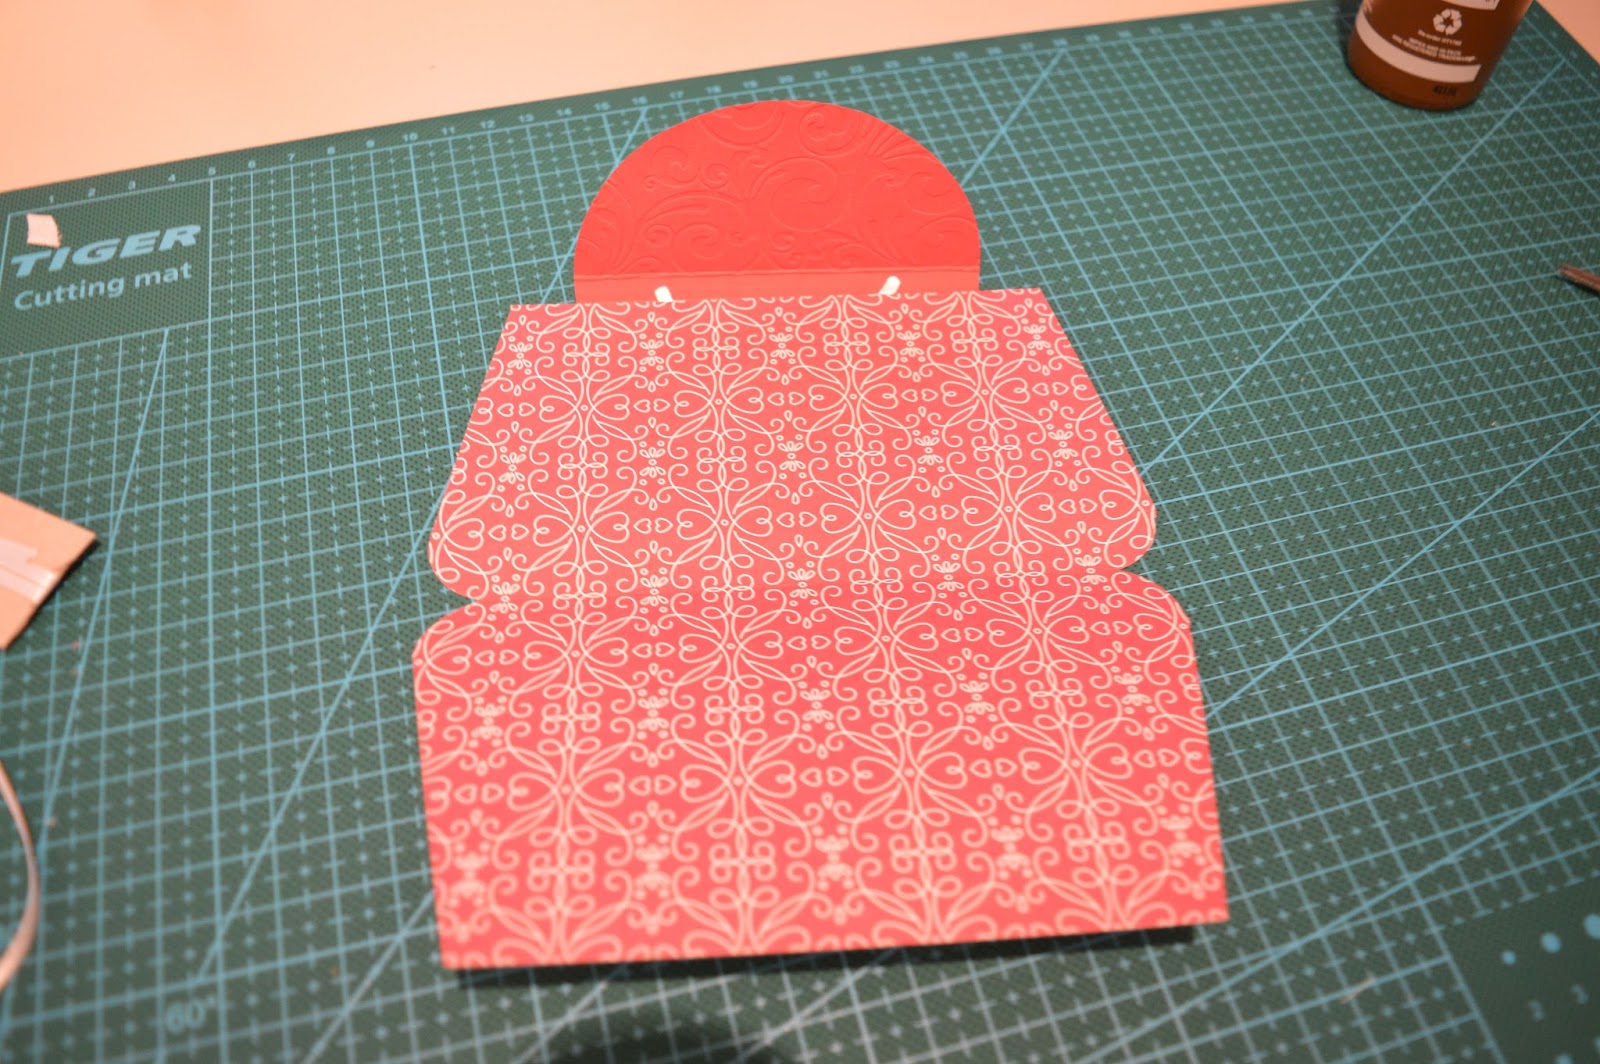
4) Round the corners on the folded sides

5) For the closure cut a circle out using a die. You can make this as big or as little as you would like

6) Score 1/8" each side of the centre so you get a large fold in the middle

7) Using a hole punch, punch two holes out between your too scorelines

8) This is optional but you can emboss one side of your circle


9) Thread some string or ribbon through the whole and tape or glue to the inside of the side you haven't embossed


10) Apply a generous amount of glue to the same part you put the tape/glue and adhere to one of your gift card holder once opened. Be sure to adhere it onto the outside

11) For the closure you could try a number of things but I decided to use small circle piece of velcro
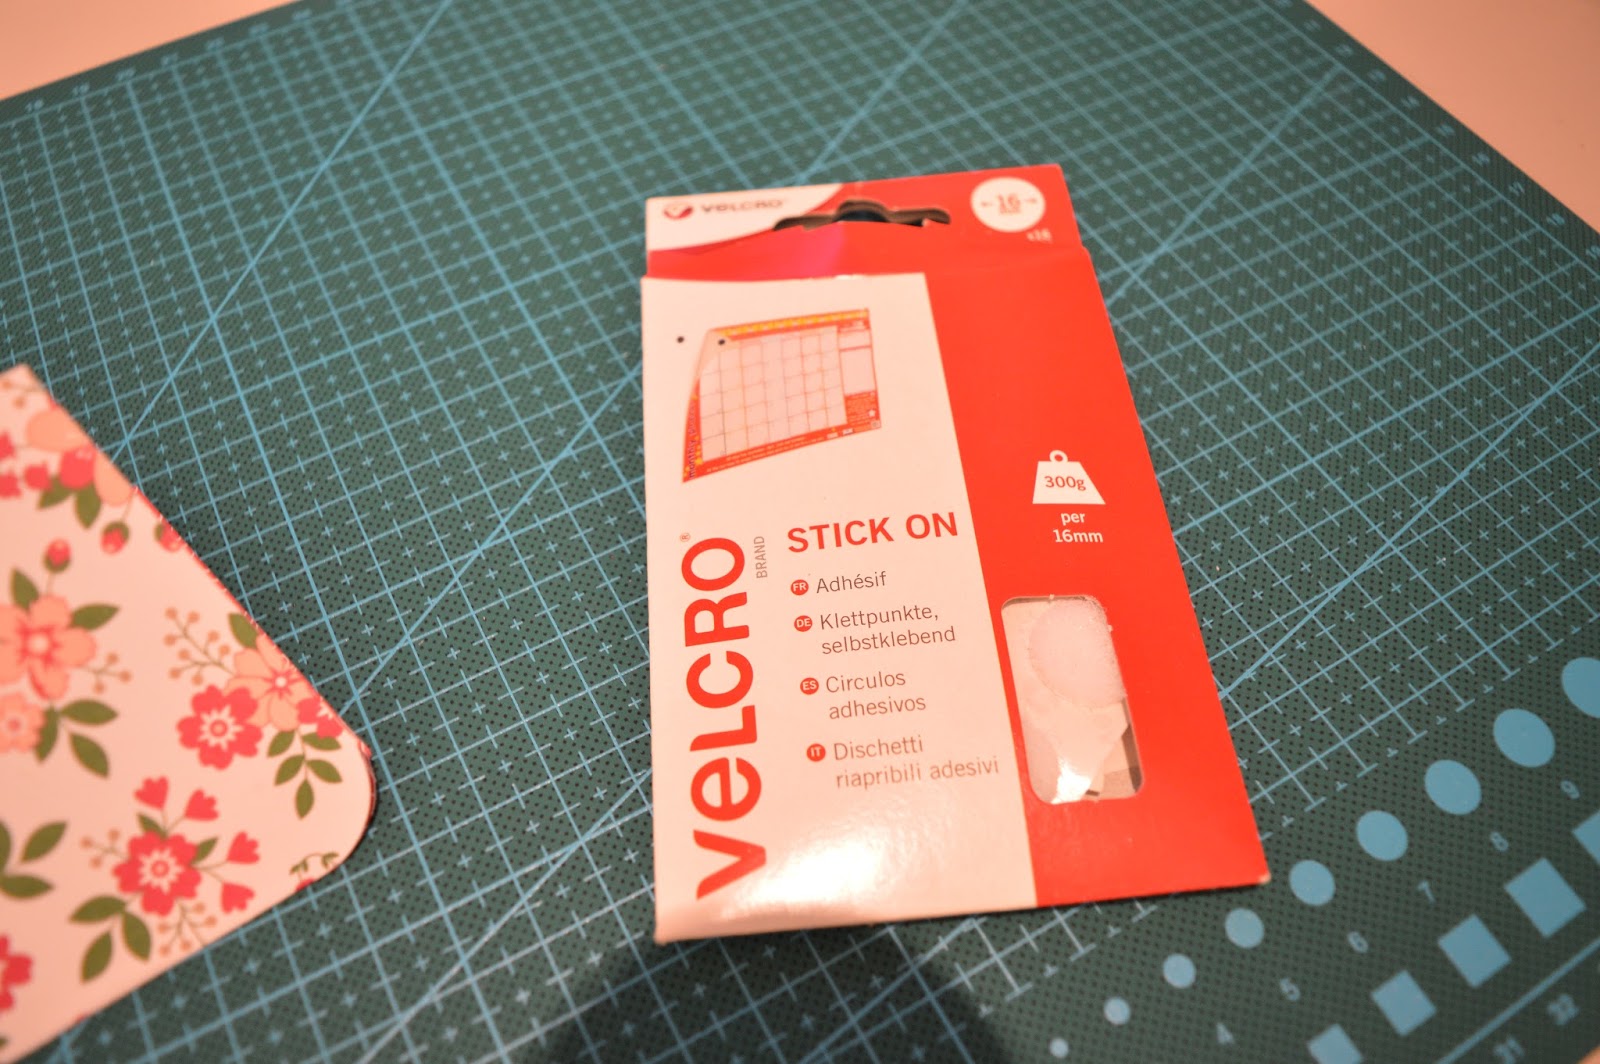
12) Stick one piece of velcro to the inside of the embossed half of your circle, close the bottom and use a guide to attach the other half of the velcro to your purse


13) Finally finish with any embellishments you would like and attach your gift card (using a mild glue). You could also cut a shape out so you have space on the inside to add your message!


I really hope you enjoyed this tutorial. You could this technique to create so many different styles of bags! I'd definitely recommend trying it out next time you want to give a loved one a gift. You could also put money in there or make it into a cute card.
Let us know what else you'd like to see on the blog.
Happy crafting!
Susan x
No comments:
Post a Comment