
In todays post I want to show you a watercoloring technique I recently discovered and also an idea of what you could do with it. When I have heard anybody talk about it they have referred to it as the smooshing technique. It's because you use a piece of acetate and actually smoosh the ink on the paper.
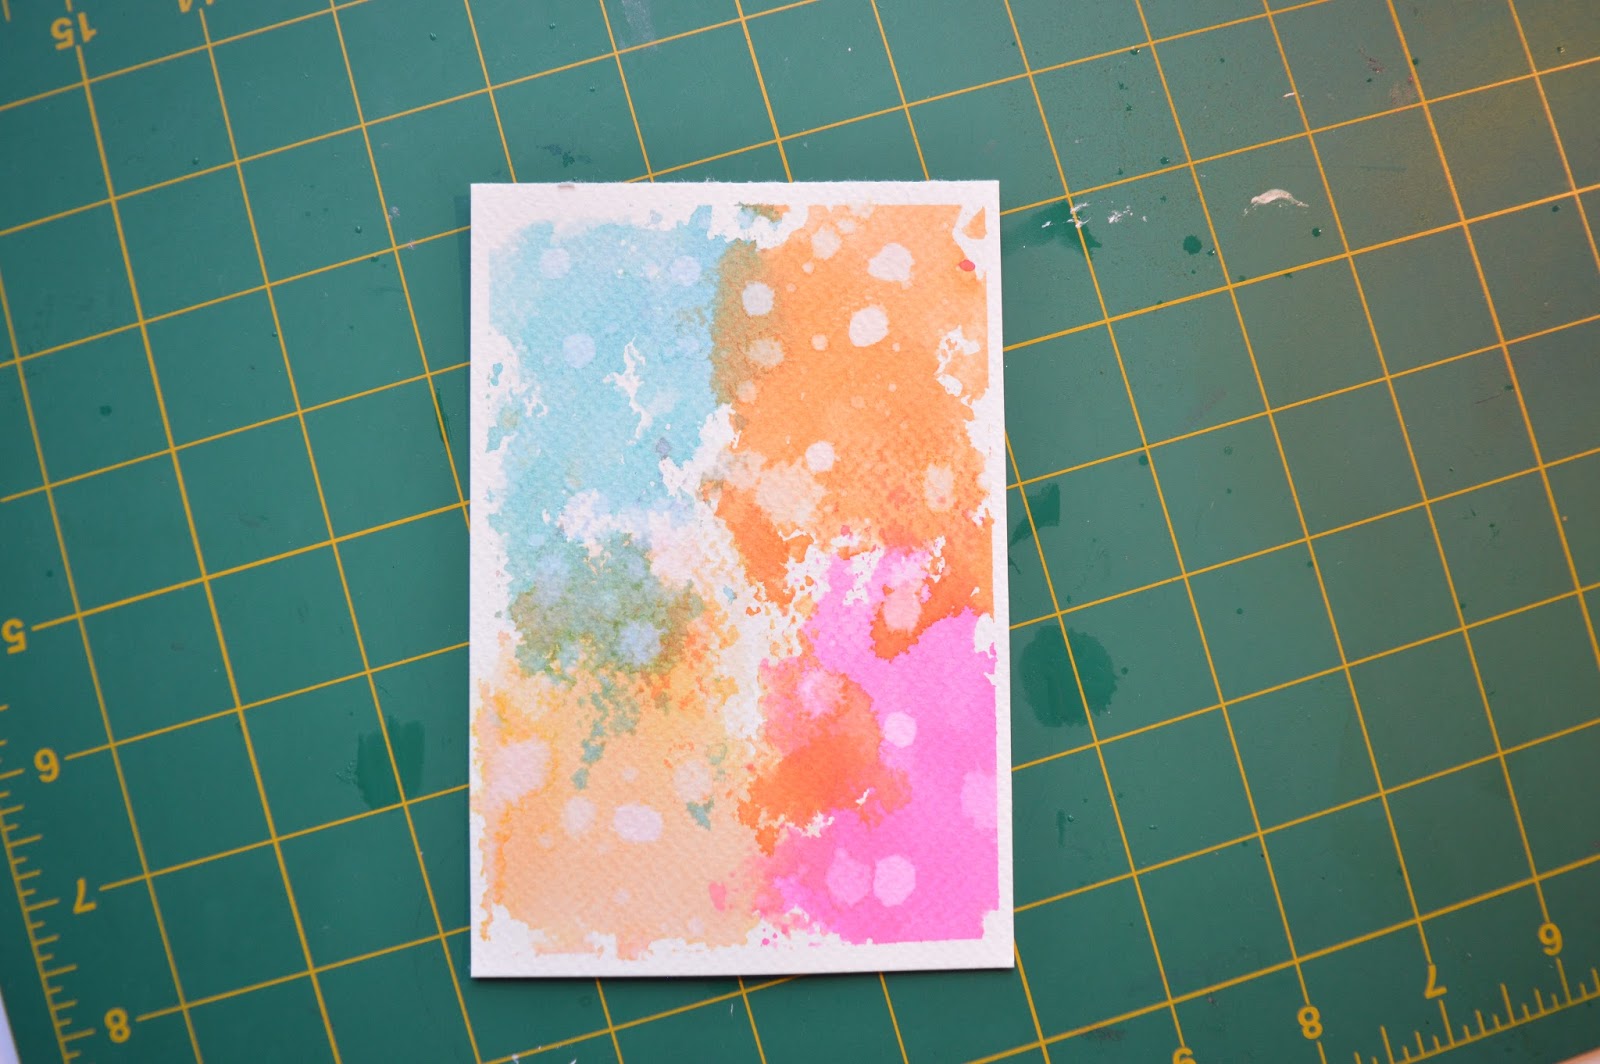
This is what it looks like.

I love the effect it creates and you can use the technique to get so many different designs! I love the almost child like element it has as well. I actually turned it into a 'Happy Birthday' card which you can see below. I think it would be perfect for a young one's birthday.

I would still consider myself a beginner when it comes to watercoloring and I found this technique very easy to use. I think you should give this a go and if you have any children get them involved; i'm sure they will love it!
Keep reading to find out how you can do it!
What you will need:
- Watercolour paper or card
- Inks of your colour choice - preferably ones that work well with water like Distress Inks or Stampin' Up!
- Clear stamping blocks
- Masking or painters tape
- A scrap piece of acetate
- A pipette
- A spray bottle with water in it

Steps:
1) The first thing you want to do is tape your watercolour paper down onto a mat. I just used some masking tape for this

2) To achieve this effect all you need to do is take a clear stamping block, rub it onto your ink pad to get some colour onto the block. Then pick up a piece of acetate, push it onto the block to get some of the colour onto it then simply smoosh the acetate onto the watercolour paper. I chose four colours so I just put one in each corner. Let the acetate move around slightly as this isn't meant to be perfect. You can also use the acetate to drag the colour around slightly. Usually when you are doing a large water colour piece you wet the paper where you want all the colours to go. In this case you want to do it on dry paper. The reason for this is that you don't want the colours moving around too much or you won't get that stained like effect.
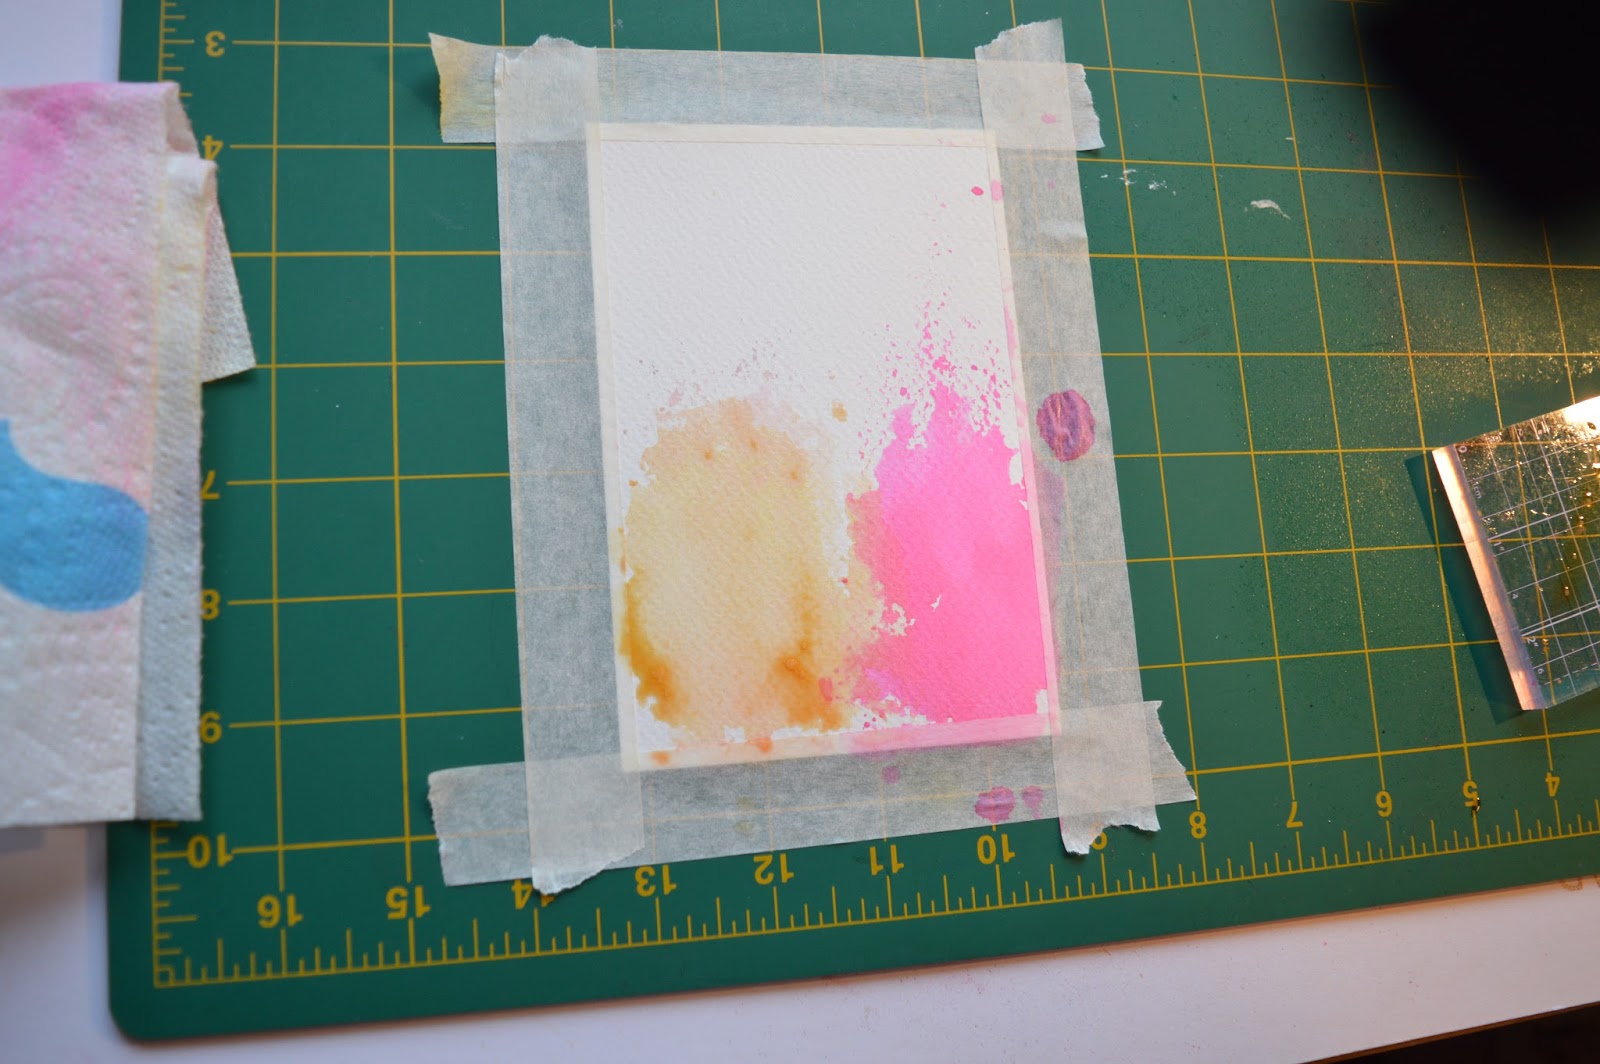
Keep repeating step two until you have use all your chosen colours.
TIP: When choosing your colours and where you want to put them you have be careful with mixing certain colours. For example, if you mixed yellow and purple it would turn into a greyish colour which you may not want however if you mixed blue and yellow you would get green. This is because yellow and purple are complimentary colours. I would recommend googling the colour wheel and any other that are opposite each other - do not mix. This doesn't mean you can't use them on the same piece of paper it just means you can't let them physically mix together.

3) Once you have completed your picture dry it with you heat tool.

4) OPTIONAL: I have seen this technique used on a lot of watercolour pictures and I absolutely love what it does to the picture. You can do this in two ways; the first way is to spray some water into your hand (or even directly onto the page) and shake your hand over the paper to get a random splatter of water droplets onto your work. The second way is to put some water into pipette and put water droplets all over your work. If you use the second method you have a lot more control over where the water droplets go, how many you do and even how big they are.


5) Let the water sit there for a minute or two to allow the ink to be re-activated then place a piece of tissue over your work and press down to lift the water off. This works best with ink that work well with water like Distress inks or Stampin' Up inks.

There you have it. Using the water droplets you get this bleach effect across the page which I think gives it that little extra!
I used it on a card to show you something you could do with it. I made the flowers out of practice pieces I had done and a punch from Stampin Up! Just to show you another reason why you should never throw away practice projects even if you think they didn't come out right.

I love how even as beginner and quite frankly not the best painter in the world I can use different techniques to achieve beautiful pieces of art.
You could even create a scene on a beach buy using an orange and yellow ink on the bottom and some blues and greens for the sea/sky. You could just need to change where you place the ink and smoosh it in the area you want it to go.
As I said I even got use out of my practice piece which as a whole didn't come out how I wanted to it all but I kept them to use certain areas that came out nicely.
I really hope you enjoyed this post and if you try it yourself or even with your children/granddaughters or anything put a picture on twitter or instagram or use the hashtag #sukilucrafts so I can see! I will definitely be trying this with my granddaughters.
Happy crafting!
Susan x
No comments:
Post a Comment