Hey everyone and welcome back to another post! I have another SukiluDIY which I'm so excited to do.
Since I've started crafting and making my own things anytime I buy things from shops I find myself adapting them to suit me or adding my own embellishments/decorations. Having this blog I found myself going through mounds of paper with notebooks/pads and sticky notes as I'm constantly writing lists and ideas of projects I want to do.
I don't have really cute or pretty notepads or sticky notes so I wanted to give it a go in making my own. I love how they turned out so much and they were so easy to make! I didn't even had to use whole sheets of paper. I went through my scraps and I had all I needed there (except for the inside - the actual pad).
These are so easy to make and as you can see - adorable!
They are perfect small gifts for any stationary or crafting addicts and you can add as much or as little in terms of embellishments as you would like. They also have a functional use to them too as you can use them to keep your notes or lists in one place!
If you want to make your own DIY Notepad then just keep reading!
What you will need:
- Around 40 pieces of paper cut to 3" x 4". You can use any colours for this I just chose white
- Thick card cut to 3" x 4"
- DSP cut to 7 1/2" x 4 1/2"
- A second DSP cut to 3" x 2"
- Liquid glue - I used Tombow; my favourite!
- Binder clip
- A brad
- Stick on velcro
- 1/8" hole punch
Steps:
1) The first thing you need to do is decide how many pieces of paper you want your notepad to have. I did around 40 so keep in mind if you do a lot more of less. You want to have 3" x 4" pieces and attach a binder clip to keep them together and straight. You then need to rub some liquid glue - with a brush or your finger - along on one of the 3" sides and set aside to dry. Leave the binder clip on whilst drying
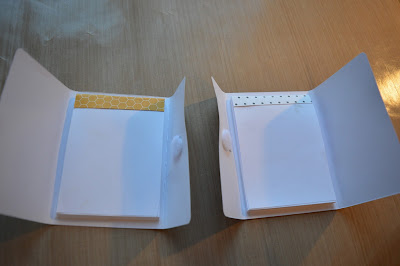
2) Once the glue has dried on your pad stick a 3" x 4" piece of this card on one side - this will be the back. Then cut your chosen DSP for the inside to 3" x 2". Cover entirely with liquid glue and stick onto the card you have attached to your pad. You want it to be slightly more than half so when you keep sticking over the top of your pad it's uneven on both side. See pictures below
This is the front
This is the back
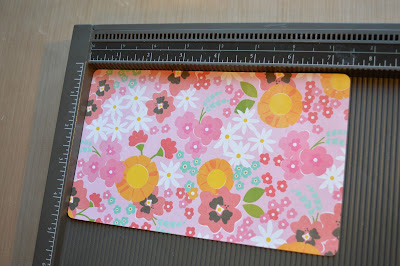
3) You will then need to cut some dsp to 7 1/2" x 4 1/2" for your notepad holder. I rounded the corner for a smoother finish but this is optional
4) You will then need to score your holder at 2 3/4" and 6" with the long sides at the top and bottom
5) Found and burnish your scoreline. Then on the smallest tab, punch out a 1/8" hole in the centre and place a brad in it
6) You will then need to stick your notepad inside on the centre tab. Be sure to take into account what way you open if it matters to you.
7) To finish it off all you need to do is stick some velcro down to act as the closure - use where you put the brad as a guide, then you are all finished!
I just can't get over how cute these are! Danielle is obsessed with them!
Had I made when I first started crafting I probably would've felt a bit silly but I have really feel now that I have so much more confidence in my projects. I never feel silly showing people what I make and as long as I like them, that's all that matters to me.
Doing projects like this to me is very addictive. I now find myself looking at the things I buy, the things I already have and think to myself 'could I make one of them?', 'what can I do to make it better?'. Anyone else do that?!
If you try this project experiment with different shapes, sizes and colours and let me know if you find something interesting! I love how many different ways you can take a tutorial or watch someone make something and make it your own completely.
I really hope you enjoyed tonights post and make sure to leave any requests down below in the comments section!
Don't forget if you re-make this tag me on twitter or instagram or you can use the hashtag #sukilucrafts.
Happy crafting!
Susan x


No comments:
Post a Comment